
 Telling myself, “I want to eat a salad every single day,” is one thing. Actually prepping, chopping, and cleaning up the kitchen day after day? That’s a totally different story. If you’ve hit the midweek slump where the thought of prepping another salad sounds exhausting, making salads in a jar saves time and keeps everything fresh. Meal prepping this way means you can grab a healthy, tasty lunch (or dinner) straight from the fridge, with no fuss.
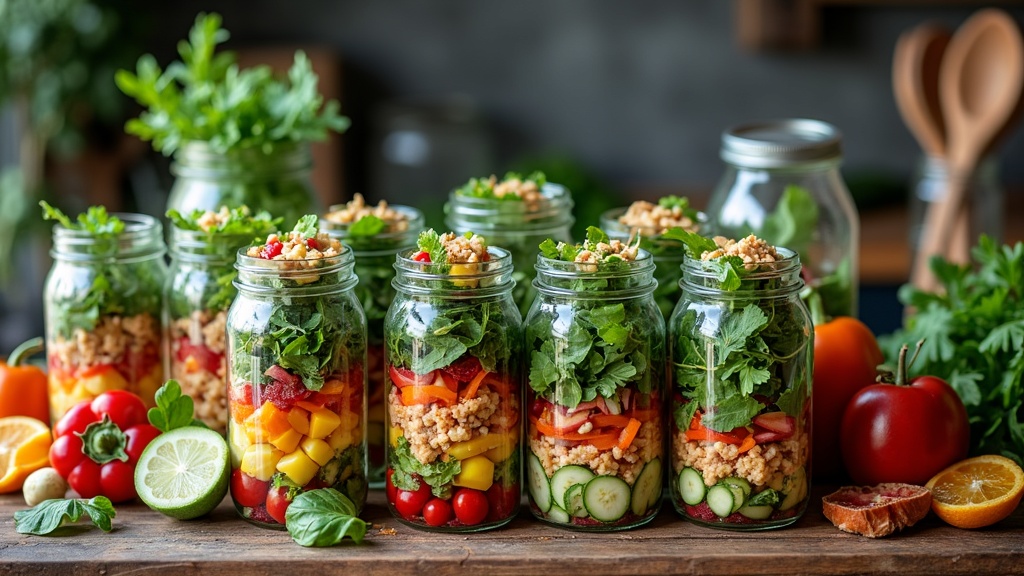
Building a salad in a jar does take a little planning, so veggies stay crisp, nothing gets soggy, and everything tastes as good as it did on day one. Here’s a guide to putting together salads in a jar step by step, including what jars work best, which ingredients to layer and when, how to keep it fresh, and a few salad combos worth trying out.
Step 1: Pick the Right Jar
Picking the right jar is the first thing I think about before starting this meal prep routine. I’ve found widemouth Ball brand jars work best. The wider opening makes it much easier to fill, pack in layers, and, when you’re ready, tip the salad out onto a plate or bowl. A quart-sized jar is perfect for a main meal salad, while pint jars are ideal if you want a snack sized option.
- Look for glass instead of plastic containers. Glass is durable, keeps everything crisp, and doesn’t hold onto smells or colors from dressings or veggies.
- If you’re making several salads in one go, having at least 4-6 jars lets you get your meals ready for almost a whole week.
Having a set of matching jars also makes your fridge look next-level cool. Stack them in a row and you’ll feel like you’ve really got your meal prep game in order.
Step 2: Add the Dressing First
Start with about 1/4 cup of your favorite salad dressing poured right into the bottom of the jar. Pouring in the dressing first keeps the greens and lighter ingredients from getting soggy, so the whole salad stays fresh for days. Just about any dressing works here: creamy ranch, Caesar, honey mustard, vinaigrette, or something homemade all fit the bill. Switching up your dressings week to week is a fun way to mix in some variety.
- Thicker dressings won’t leak into the upper layers as easily, so ranch or creamy dressings work really well for meal prep.
- If you’re not sure how much dressing to use, start small. You can always add more when you serve it, but it’s tough to fix an overdressed soggy salad.
Step 3: Pack in the Dense Ingredients
Next are the densest, firmest ingredients. These should be anything sturdy enough to sit in dressing and not get strange in the fridge. Think whole cherry tomatoes, diced bell peppers, roasted chickpeas, carrots, cooked beans, corn, artichoke hearts, broccoli florets, nuts, or seeds. If you’re using anything canned or super juicy, give it a quick drain or pat with a paper towel so your salad doesn’t get watery.
- Try mixing and matching for texture—add crunchy seeds or nuts with softer veggies like roasted sweet potatoes or steamed edamame.
- Keep layered ingredients separate that might stain (like beets) if you want the look of a bright, clean presentation.
- Roasted chickpeas or crunchy legumes give a fun pop, and the more texture you add, the more interesting each bite becomes.
Step 4: Add Protein
After the veggies go in, add your protein. Sliced grilled chicken, steak, roasted turkey, cooked and cooled bacon bits, firm tofu, or even hardboiled eggs all hold up well. Skip fish or shrimp unless you plan to eat the salad soon—these don’t keep as long and can change the flavor fast.
- Chop or shred chicken or beef fairly small so it’s easy to eat right out of the jar.
- If you meal prep for the whole week, save egg or tofu for salads you’ll eat earlier (within 3-4 days).
- Chickpeas, beans, or lentils are great plant-based protein add-ins and last the full week.
Step 5: Layer the Softer Ingredients
Now it’s time for the less dense, more delicate ingredients that shouldn’t get crushed. Think red onion rings, sliced cucumbers, fresh strawberries, blueberries, apples, or grapes. These layers sit in the middle of the jar and act as a buffer between the heavier stuff down below and the greens on top.
- If you’re using fruit, toss the slices with a tiny splash of lemon juice, as this helps keep apples and pears from turning brown.
- Cheese, like feta or shredded cheddar, can also go in this layer, but keep it away from the dressing if you want it to keep its crumbly texture.
- Dried fruit like cranberries or raisins is also a great middle layer addition.
Step 6: Fill to the Top with Greens
Last up, add as many greens as you can pack in. I stick to chopped romaine or iceberg lettuce for crunch. Spinach is a solid pick too; just avoid extra delicate or super leafy greens like arugula, which wilt quickly. Fill the rest of the jar, pressing lightly, and leave just enough room so you can add a folded paper towel at the very top. That little paper towel layer is a total game changer, soaking up stray moisture so the greens stay crisp for days.
- Once the greens and paper towel are in, screw the lid tightly onto the jar and pop it in the fridge.
- Salads made this way keep well for 4-6 days.
- If you want more flavor, try mixing in fresh herbs like basil or dill near the top for a bright punch when you serve.
Jar Theme Ideas: Try These Combos
Boredom is a salad killer. Switching up your ingredients with new combos makes salads in a jar worth looking forward to. Here are some of my favorite ideas:
- Taco Salad Jar: Salsa or chipotle dressing, black beans, corn, chopped bell pepper, diced grilled chicken or ground beef, cheddar, cherry tomatoes, romaine. Add crunchy tortilla strips right before serving.
- Caesar Salad Jar: Creamy Caesar dressing, grilled chicken, cherry tomatoes, shredded Parmesan, homemade croutons, romaine hearts. Croutons go in just before serving.
- Asian Inspired Salad Jar: Sesame ginger dressing, shredded carrot, edamame, red bell pepper, mandarin orange segments, sliced almonds, grilled chicken, chopped spinach and romaine.
- Classic House Salad: Italian dressing, grape tomatoes, cucumber slices, sliced red onion, black olives, shredded mozzarella, iceberg lettuce and spinach mix.
Toss in cooked quinoa or wild rice if you want a more filling, grain- based salad. You can even do a Mediterranean themed jar with hummus, falafel, roasted red peppers, kalamata olives, and greens for a hearty twist.
Frequently Asked Questions About Salad in a Jar
How do I eat a salad in a jar?
When you’re ready to eat, just unscrew the lid, pull out the paper towel, and pour the contents onto a plate or bowl. The dressing goes over everything as it tumbles out. If you want, shake the jar gently before flipping to help get the dressing all around. Eating right out of the jar works too, but a plate makes mixing it easier.
How long will it stay fresh?
Most salads last 4-6 days in the fridge, especially when you follow the layering method and use crisp greens. Avoid ingredients that spoil quickly, and use the freshest veggies you can. If your fridge is very cold, you might see some greens last up to a week, but keep an eye out for signs of wilting.
Can I skip the paper towel step?
You can, but that quick add-on really helps greens stay dry. If you don’t use the towel, plan to eat your salad in the next couple of days. The paper towel trick is also handy if you carry jars to work and want crisp greens by lunch.
Which greens wilt fastest?
Arugula, mixed baby spring greens, and butter lettuce wilt and get slimy faster than romaine or iceberg. Stick with crunchy varieties if you want your salads to last the whole week. Feeling adventurous? Try adding kale, as it really holds up and adds texture.
My Favorite Tips for Stress Free Salad Prep
- Prep all your ingredients at once, then line up the jars and build salads assembly line style for max efficiency.
- Don’t skip drying your greens—spin or pat them dry before packing so nothing wilts early.
- Label jars with the date you made them or the salad flavor, so weekday lunches are a no brainer.
- Use prechopped veggies if you’re pressed for time—anything that makes it easier to stick with salads is a win.
- Choose a salad theme for the week. Planning ahead helps you shop more efficiently and enjoy a little variety.
- Shop for everything at once to save trips. Buying in bulk can also make it cheaper and less stressful and cuts down on food waste.
- Batch chop and assemble jars so you can grab and go—all week long.
Trying out salads in a jar means less time in the kitchen and way more fresh veggie goodness on your plate, all week long. Mix and match different combos and you’ll nail your goal of eating salads daily, with no sweat. If you’re looking for even more ideas, track down recipes online or jump into new flavor themes for endless variety. Wrapping up: salad in a jar isn’t just about meal prep—it’s about making healthy eating doable, delicious, and super convenient!